As I worked intuitively on "Transitions and Transformations" I realized by the 3rd layer (which was supposed to be the last!) that things were not pulling together as well as I wanted. I decided to turn to the chine colle technique to see if adding shaped paper into my print would do the trick! It did... ;) See my steps below!
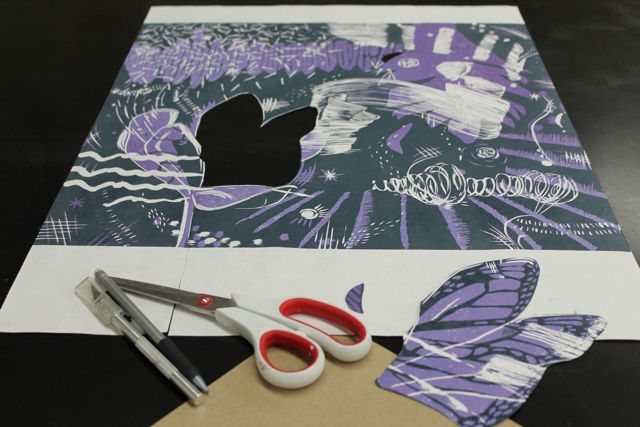
Take a preferably dry print and cut out the shape you want to add into the print. I decided I wanted the wings and a small semi-circle to be added in paper to my print.

Place the cut-outs upside down onto the BACK of the paper you wish to add into your print. In this case, I was using a color that had a pattern on the back of the paper. Make sure the paper that you select is not too thick.

Cut out that shape!

Check your cut-out shapes in a print. Make sure they fit where you want them, and the sides match up.
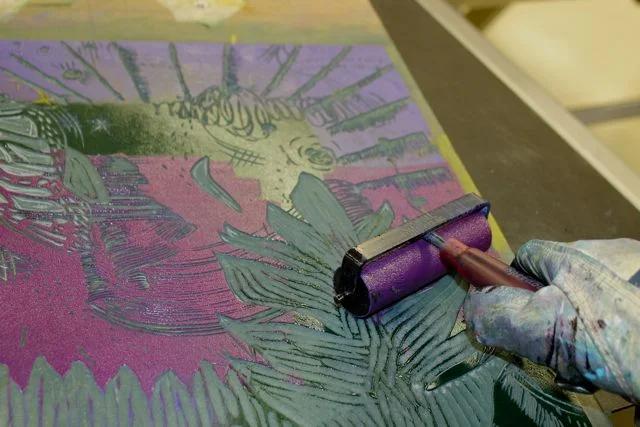
Ink up your printing plate to prepare for printing your last layer and your chine colle layer. I use small brayers sometimes because I like to "paint" my ink on to the surface of my plate.

All inked up! Ready for chine colle....

Add glue to the back of your chine colle paper (remember, the back of mine had a pattern). I use yes glue, rolex glue, spray mount, and traditional wheat or rice glue for this step. Use an archival glue always! Don't use too much, or get the glue too close to the edges of the shape.
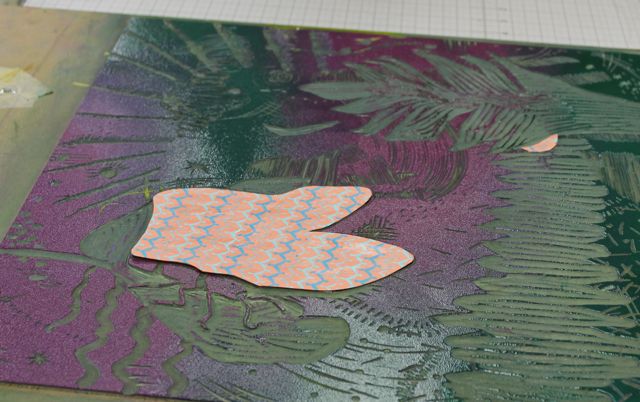
Carefully, place your paper on to your printing plate, glue side UP! Make sure not to let the paper slide; once it's down, it's down!

Lay the printed paper over your inked up block and the chine colle paper, and run this through the press. You can see part of my "reveal" in this photo with the chine colle paper now attached and printed within my print.

The print works now!

These are 4 out of 8 prints from this varied edition series.